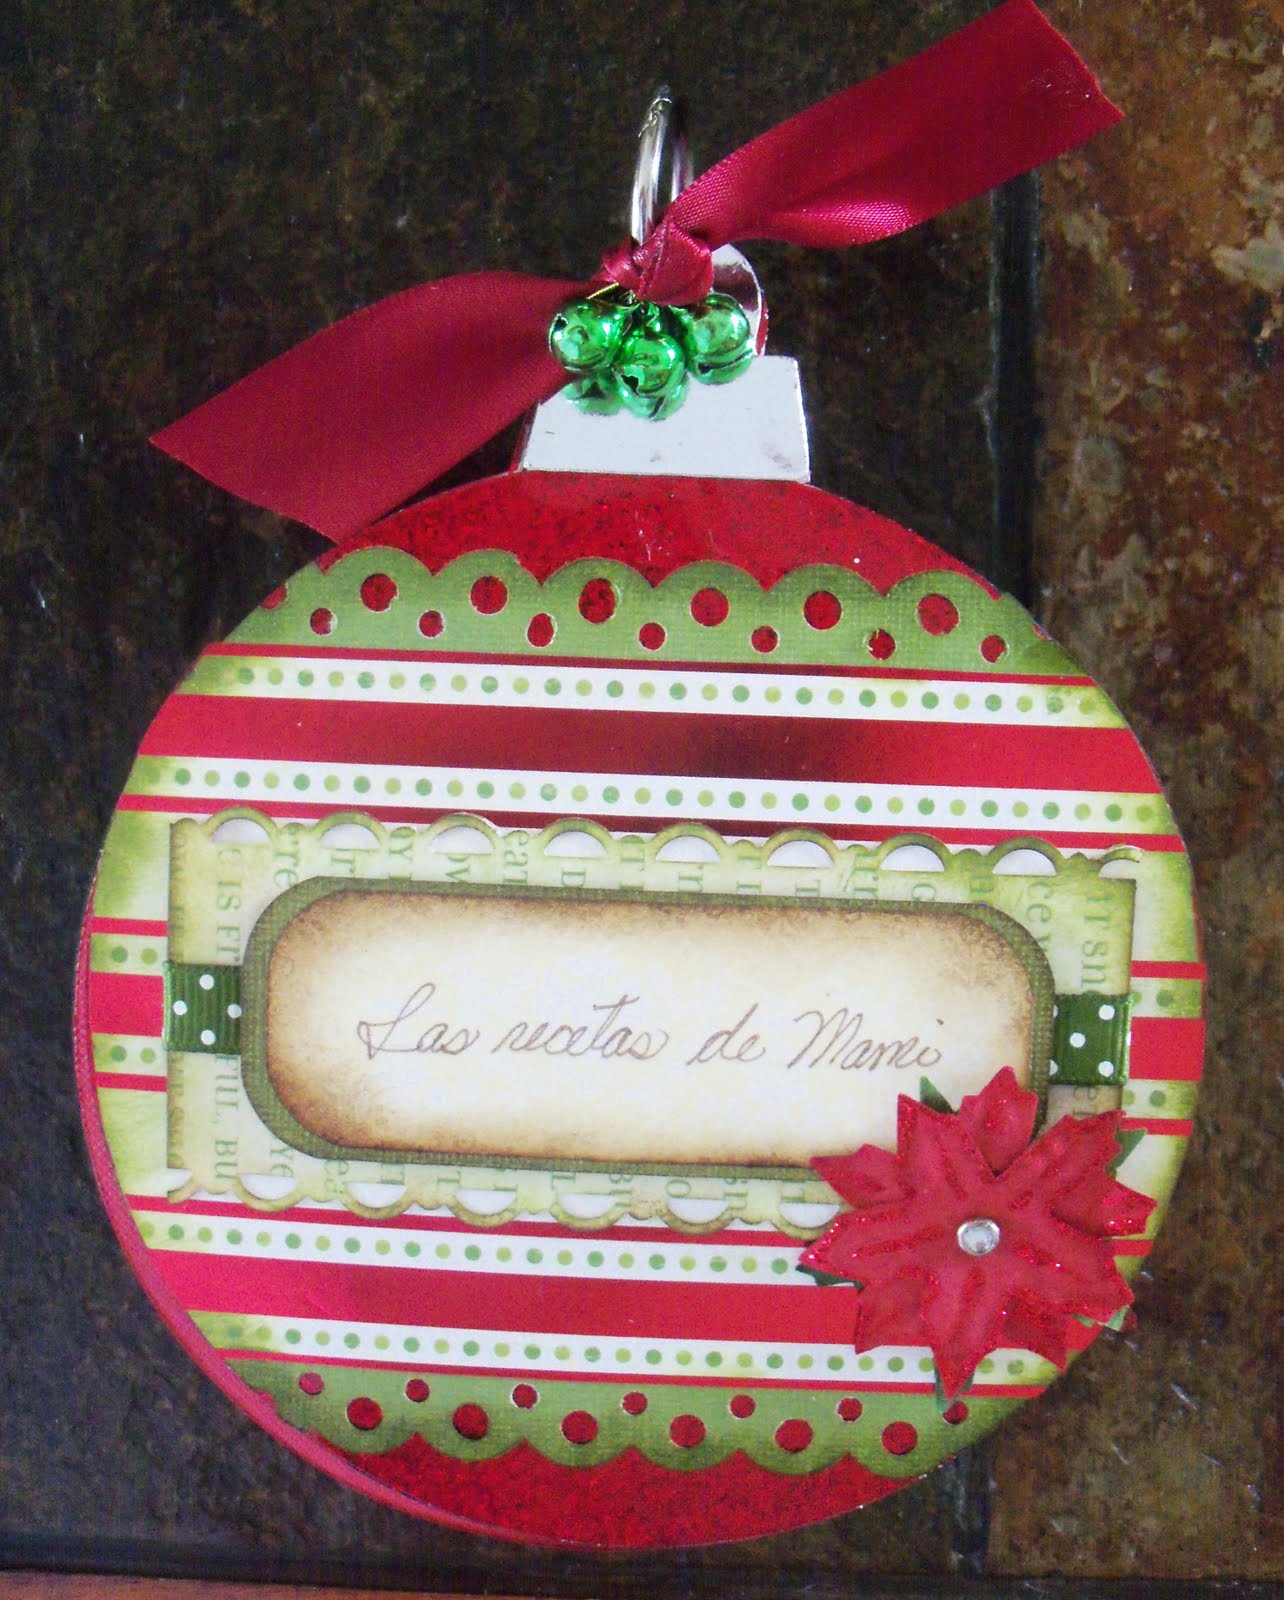
On the Eleventh day of Christmas ....... I made my children an "heirloom cookbook" with 11 of the Holiday recipes my children like the most.. Why ??? Last year, while I was fixing all the yummy food for Thanksgiving dinner, my middle child Carlos (of 5 children) kindly asked me (while he was doing a lot of "tasting"): "Mom, do you have the recipes for all this delicious food that you make written somewhere ???" Well, the question caught me by surprise, and got me wondering...." hmmmm am I getting "that" old.... what if I write a cookbook with all of the recipes they love, and give it to them as a Christmas present. Well, needless to say, that Christmas came and went and I did not make the "book".
Thanks to Jess at
kinderStampo who asked to join her Christmas in July blog Hop, I got the chance to work on my children cookbook way ahead of time. :) This "heirloom cookbook" has its own wall hanging, and I will give instructions on how to make both items.
***Esta libro, es una coleccion de recetas navide~nas favoritas de mis hijos. Este surge, a pedido de uno de mis 5 hijos, que mientras yo preparaba la cena de Accion de Gracias el a~no pasado, me pregunto si yo tenia escritas esas recetas por algun lado. En adicion a sentir que me estaba poniendo tan vieja como para que mis hijos ya tuvieran "esa" preocupacion, pense que en efecto, debia sentarme a escribirlas. El "libro" tiene un adorno de pared, que lo sujeta, para que este siempre a la mano. A continuacion, las instrucciones para ambos.
****Leave a comment on this post with your email, to get the chance to win my blog candy: A kit to make the book yourself, at home !!! **** The winner will be selected using random.org on Tuesday 27.
All of the project, was designed on my
Gypsy.
COOKBOOK:
- Cartridges used (cartuchos): Joys of The Season (book- ornament shape / libro), Christmas Noel and From My Kitchen (embellishments on pages inside the book / adornos en paginas interiores).
- Book cover-ornament was cut at/ la cubierta del libro se corto a: 5.75 inches.
- Cut 4 pieces: 2 on chipboard and 2 on cardstock that has been previously covered with self adhesive red glitter paper. (I used recycled chipboard from cereal boxes). / corte 4 piezas: 2 en carton fino, como el que tienen las cajas de cereal y dos en cartulina.
- Cut ornament tops with mirror carstock. / Corte el "tope" del "adorno" en cartulina brillante.
- Decorate the book cover as you wish, using pattern and solid papers, flowers, glitter, border punches, etc. / Decore el frente como desee.
- Cut a strip of paper to write a title. / Corte una tira de cartulina para escribir el titulo.
- Ink the edges of ALL parts / Sombree todas las orillas de las piezas.
- Inside pages: / paginas interiores:
- Cut cardstock at 5.75. Cut as many pages as you need per recipe. ( I cut 11).
- Cut an ornament top for the back and front of each page. This will give added support when handling pages back and forth.
- Cut white cardstock circles to write your recipes. Ink well and glue to cardstock pages.
- Embellish blank spaces on pages with store bought embellishments or make your own.
- Insert a book ring through the hole in the "ornament" top of each page. Tie a piece of ribbon on the book ring.
WALL HANGING:
- "Feliz Navidad" ( Merry Christmas) sign:
- Paint wood board with acrylic paint.
- Add hardware (on the back) to hang sign from the wall.
- Cut The letters for Christmas Greeting ( I used Plantin Schoolbook cartridge)
- Cut them on chipboard and on cardstock. Cover each chipboard letter with the cardstock and ink.
- Decorate with ribbon bows and flowers. Glue them to the wood with a hot glue gun.
- Nativity Scene"
- Paint wood with acrylic paint.
- Add hardware to hold chain and screw a hook to the bottom of the wood plaque to hold cookbook.
- Add some shimmer in the center of the board with Smooch Spritz.
- Cut all Nativity shapes at 3.25 inches.
- Cut Mary, Joseph and Baby Jesus on chipboard and on cardstock. Cover the chipboard pieces with the cardstock. Stamp faces on Mary and Joseph with Peachy Keen stamps.
- Ink all shapes and glue to wood board.
- Cut some pieces of raffia and glue to manger. Add Baby Jesus image.
- For the STAR: cut one star on acetate and one on white cardstock. Spray Smooch Spritz on the acetate star and allow to dry. Cut of the tail of the cardstock star. Glue the white star onto the acetate star and cover it with Stickles.
Finish wall hanging by adding chain to the hardware in order to link together the Greeting sign and the Nativity. Hang the book from hook.
I now will like for you to hop over to our next blog:
http://scrappymel.blogspot.com/
MeRRy ChrIsTMas !!! .... HaPPy HolIdaYs !!!! :) HaPPy CraFtiNG !!!