Showing posts with label chipboard. Show all posts

Saturday, March 19, 2011

"HomE Is WhERe ThE HeArT iS" ... a very crafty home...and heart !!!


HI ! And welcome to KinderStampO's "Home is Where the Heart is" Blog Hop sponsored by Unity Stamp Co. If you have arrived here from  Angie at http://angiesscrappinspot.blogspot.com/
then you are in the right place. If you just stopped by to say hi but decided to join the hop, then start from the beginning by clicking here.

Now, with no further ado, I present to you my project !!!!

I made a wreath with the word CASA (which means HOME in english). Being as crafty as I am, I made a wreath in which the word "CASA" is covered with miniature items of what you will commonly see when entering my home. Those would be (but not limited to): paper crafting materials, cooking and baking (and eating) utensils, sewing and, cleaning items(which are the less used LOL).
  • Here are some of the items I incorporated to my wreath.
    • The flatware, plate and cupcake are cuts from: From My Kitchen cartridge.
    • The two hearts are cuts from: Don Juan cartridge.
    • The hearts were cut on chipboard and covered with fabric.

  • The wooden spools were covered with embroidery floss.
  • The plate,silverware and cupcake were painted with acrylic paint.
  • I filled the basket with tiny cuts of cardstock.
  • I made a bouquet of tiny flowers that were inserted in styrofoam (already in the flower pot).


  • The wood letters: C-A-S-A were painted in blue.
  • A piece of balsa wood was covered with burlap.
    • The letters were glued to the finished burlap piece.  
  •  Embellish letters and wreath as you wish. I used a hot glue gun to add the embellishments. 


      I hope that you have enjoyed my project  and felt inspired. It is time to hop on to the next blog and see what she has made. You will now be stoppping by Christi at - http://alteredambitions.blogspot.com/
  • And now, to the BLOG CANDY !!! Yuuummmm
Unity Stamp Co. 'In Store Exclusive' Throughout all Generations

Unity Stamp Co. 'In Store Exclusive'Roots and WIngs
Ippity by Unity Life's Little Moments
Unity Stamp Co. and Bella Blvd. Family Dynamix
  • How do I win ?????
    • Leave a comment on each of the blogs and let them know what you love about Unity and/ or their featured project.
    • Become a follower of the designers if you aren't already.
    • Become a Facebook follower of Unity Stamp Co. on Facebook http://www.facebook.com/pages/Unity-Stamp-Company/103252399709382 and thank them for sponsoring the hop.


Saturday, November 13, 2010

A ThAnKInG WE WiLL Go blog hop: "Lets be Thankful" ("Demos Gracias")


So the day is finally here and I really hope you are enjoying this blog hop as much as I am. You must be coming from Madison's blog at http://www.funkycards.blogspot.com/.  Thank you Jess for being such a wonderful hostess and BTW, if any of you need to go back to the beginning of the hop, click here.

There are so many things I have to be grateful for but,  the thing that I am most grateful for are my children. They have been a true blessing since the day I found out I was pregnant for the first time. Now they are young adults and guess what ??? ... LOL... they keep me young, happy and soooooooo active!!! .... more than I wish to. My children are the heart of my house, in which there is always laughter and activity 24/7. The best thing is that children are God's gift that keeps on giving; now I not only have 5 children but, I also have my precious grandson. It is for this reason, that a picture of my children, grandson and, my four legged son is the focal point of my special Thanksgiving project.

Lets do it:

  • Cut a house shape from chipboard. Cut a window in the front part of the house that is a little bit smaller than the size of the picture.


  • Remove the red cover of the tape to expose the sticky part. Place a piece of acetate over the picture.Cut around picture, removing excess acetate.


  • On the back part of the "window" glue a piece of ribbon or trimming to form a "curtain". Go around the window frame (back part of the "house" with Terrifically Tacky Tape and remove the red plastic.
    •  Place window over picture, making sure picture is centered. Cover chipboard with cardstock.
    • **Glue front of house to the back of the house.


Make scarecrows out of chipboard and cover with cardstock. Glue raffia to dolls head, arms and  legs. Dress up.


Make window frame, scallop border and fence out of cardstock covered chipboard.


  • Cut pumpkins and leaves. Color and ink.


  • Add fence, scarecrows, leaves and pumpkins using dimensional dots and tap


Make the circles for the banner and glue to the twine with glue dots. Glue the ends of the banner twine to the house. Glue the scallop border to the house, catching in the ends of the banner.
    • The banner is written in Spanish. In English it means: "LET'S BE THANKFUL".


It's now time to hop over to Meighen's blog at http://scrappin3rdeeschik.blogspot.com and see what wonderful project she has made to express how she is thankful.
May God bless you all and have a beautiful Thanksgiving Day.
If you do happen to get lost on this hop, here is a list of all the participating blogs. :)
Jessica - http://www.kinderstampo.com/

Cheryl - http://cheryl-gibson.blogspot.com/
Debbie - http://craftydeb-ddscrafts.blogspot.com/ 
Iva - http://ivarai.com/
Jessica Baker - http://thatzuneek.blogspot.com/
Kimberlee - http://kimme-thelifeofaprincess.blogspot.com/
Linda - http://www.krazyquilling.com/
Liz - http://lizspaperloft.blogspot.com/
Madison - http://www.funkycards.blogspot.com/
Martha - http://dreamofcrafting.blogspot.com/ Hey, that's ME !!!
Meighen - http://scrappin3rdeeschik.blogspot.com/
Nicki - http://canadiannickelscrapn.blogspot.com/
Shelley - http://heartstring-designs.blogspot.com/
Sigrid - http://lovescrapreflect.blogspot.com/
Vickie - http://twochicksonalimb.blogspot.com/
Jess - http://www.kinderstampo.com/p/thanking-we-will-go-blog-hop_12.html

Tuesday, November 2, 2010

30 DaYS Of GiFt MaKinG: DAY 2 - "Blessings" Autumn Wreath with Pie Shaped Plaque


HI everyone !!!! Welcome to 30 Days of Gift Making blog hop: DAY 2 !!! Don't you think that Jill's project was cute and, oh so meaningful ! ... loved it! If you haven't seen it, click here. Her project was the first of the 30 gift making ideas you will see on this special blog hop which Jill is hosting.

My gift is for my oldest daughter Cindy (not that it will be the only one she will be getting lol). Last year I made the most beautiful autumn wreath for my door and she loved it. As usual, she asked me to make one for her and as usual, I said: "Sure!" :) I ended up not making it but, this year I made it up to her big time; her wreath is much prettier and has more elements than mine Yaaay (...feeling less guilty!) lol 

Most of the instructions will be illustrated step by step through pictures. You can use the instructions to make Christmas wreaths or any other theme wreath.

  • These are the materials that I used for the wreath: vine wreath - spray of maple leaves - spray of sunflowers - raffia - florist wire (wrapped) - glue gun - masking tape - ribbon for a bow.


Lets do it:
  • Cut the raffia into bunches of app. 6 inches long. Tie the bottom of the bunches with floral wire and cover the wired part with masking tape.
  • Cut apart the spray of maple leaves leaving a stem app. 1 1/2 inches long. (this part of the stem is what you will insert and glue into the vine wreath). 
    • Separate the spray of maple leaves that have the "berries" from the plain ones. Start arranging the ones with the "berries" all in the same direction. When satisfied with the arrangement, glue them down with the glue stick. DO NOT GLUE ANYTHING BEFORE FIRST CHECKING IF YOU ARE COMPLETELY SATISFIED WITH THE ARRANGEMENT!


  • Arrange the "plain" leaves spray halfway under the ones with the "berries". When happy with how they look, glue them to the wreath. ALL COMPONENTS OF THE WREATH SHOULD BE PLACED FOLLOWING THE SAME DIRECTION. (All clockwise or all counterclockwise).


  • Glue the raffia bunches halfway  under the plain leaf sprays and gently fan them out.
  • Cut sunflowers leaving a piece of stem app. 1 inch long and glue to the wreath where you wish.
    •  Make a bow with the ribbon and add to the bottom, a little off center.


Make a chipboard pie plaque.
Lets do it: 
  • cut chipboard shape twice and glue together for sturdiness. 
  • Glue pattern paper to chipboard with Mod Podge (Plaid). 
  • Add message on "pie". The message reads: BENDICIONES ,which is the spanish word for BLESSINGS.

  • When completely dry, cover the front and back of "pie" with Mod Podge. Let dry. 
    • Add 2 eyelets. Attach a chain with jump rings to the eyelets. 
    • Hang the completed piece to the inside top of the wreath.


And don't forget tomorrow: 30 Days of Gift Making: DAY 3 !!!! Who ??? Where ??? It's KELLY at http://kellyjoskreations.com/ I will see you there !!!! :) HaPPy CraFtiNG !!!

Here is a list of the participating blogs:

Friday, July 23, 2010

The Fifteen Days of Christmas blog hop/Los 15 dias de Navidad "blog hop"

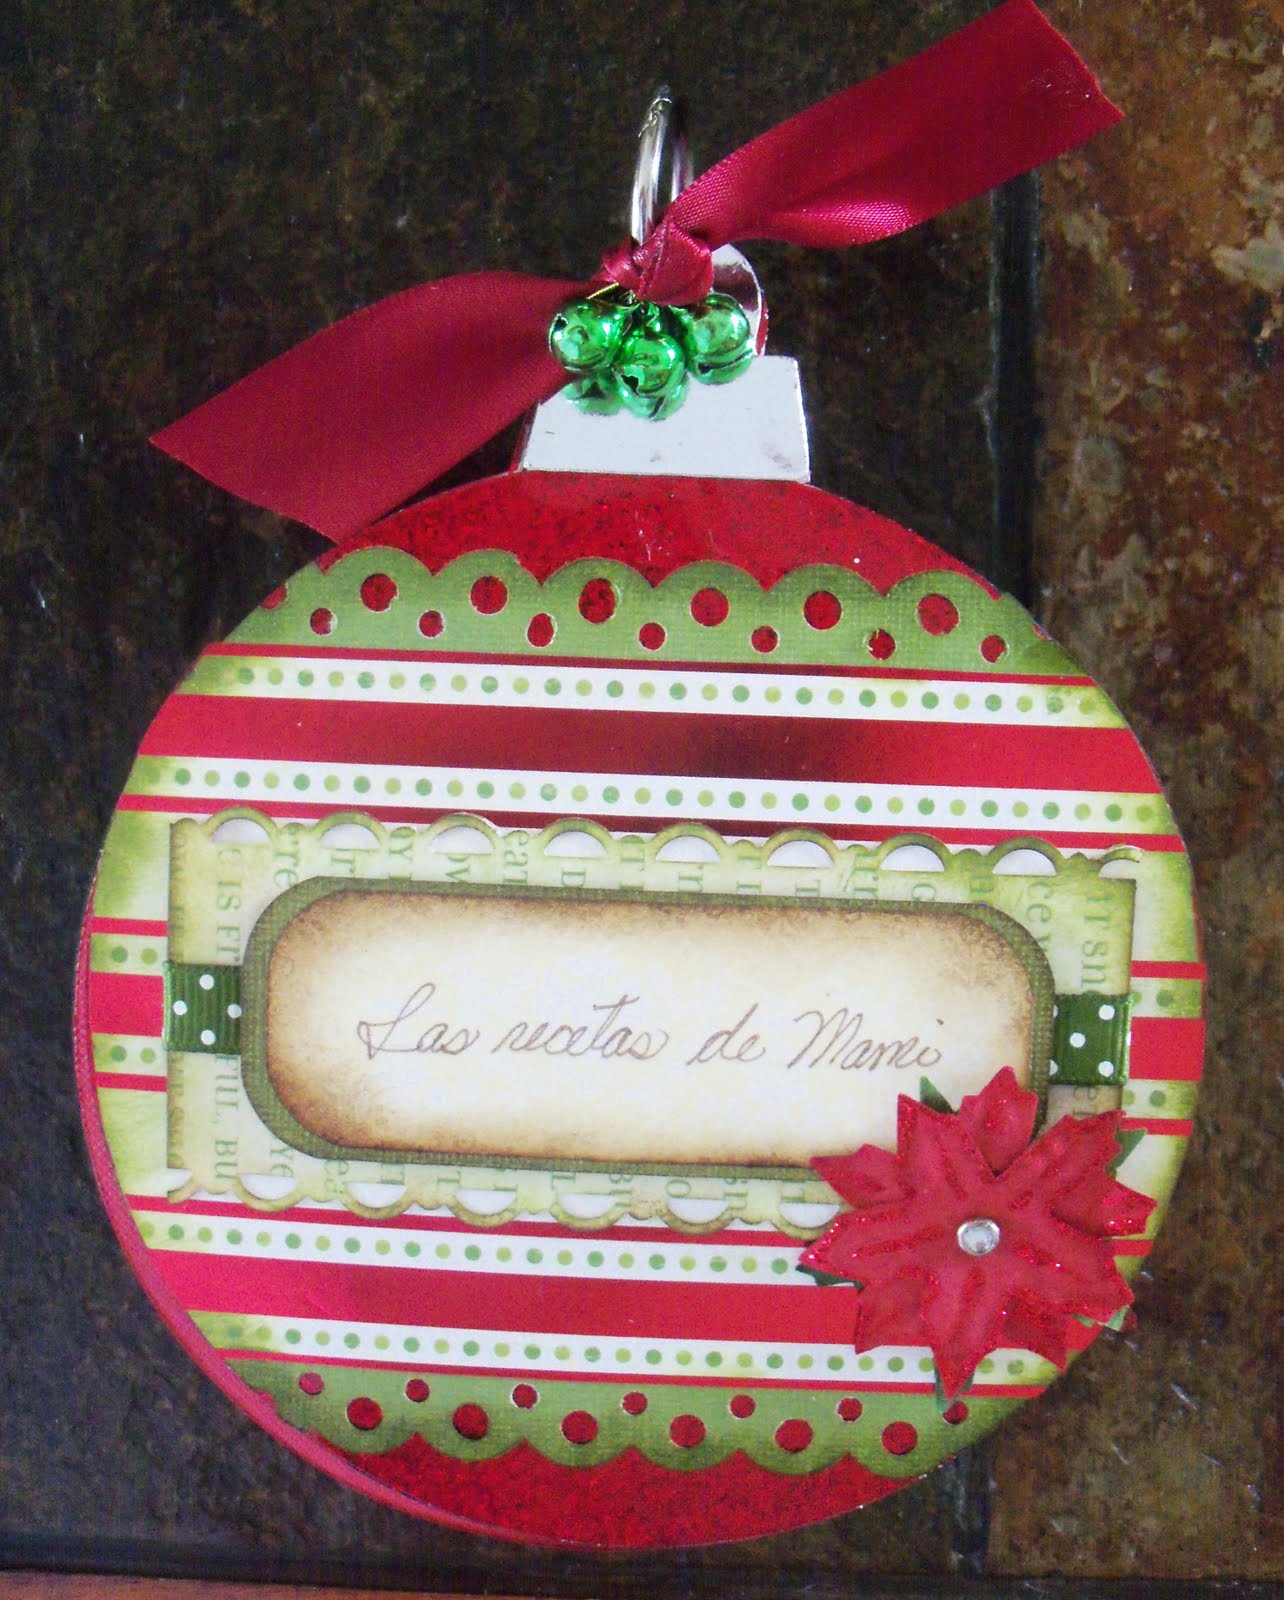
On the Eleventh day of Christmas ....... I made my children an "heirloom cookbook" with  11 of the Holiday recipes my children like the most.. Why ??? Last year, while I was fixing all the yummy food for Thanksgiving dinner, my middle child Carlos (of 5 children) kindly asked me (while he was doing a lot of "tasting"): "Mom, do you have the recipes for all this delicious food that you make written somewhere ???" Well, the question caught me by surprise, and got me wondering...." hmmmm am I getting "that" old.... what if I write a cookbook with all of the recipes they love, and give it to them as a Christmas present. Well, needless to say, that Christmas came and went and I did not make the "book".
Thanks to Jess at kinderStampo who asked to join her Christmas in July blog Hop, I got the chance to work on my children cookbook way  ahead of time. :) This "heirloom cookbook" has its own wall hanging, and I will give instructions on how to make both items.
***Esta libro, es una coleccion de recetas navide~nas favoritas de mis hijos. Este surge, a pedido de uno de mis 5 hijos, que mientras yo preparaba la cena de Accion de Gracias el a~no pasado, me pregunto si yo tenia escritas esas recetas por algun lado. En adicion a sentir que me estaba poniendo tan vieja como para que mis hijos ya tuvieran "esa" preocupacion, pense que en efecto, debia sentarme a escribirlas. El "libro" tiene un adorno de pared, que lo sujeta, para que este siempre a la mano. A continuacion, las instrucciones para ambos.

****Leave a comment on this post with your email, to get the chance to win my blog candy: A kit to make the book yourself, at home !!! **** The winner will be selected using random.org on Tuesday 27.

All of the project, was designed on my Gypsy.

COOKBOOK:
  • Cartridges used (cartuchos): Joys of The Season (book- ornament shape / libro), Christmas Noel and From My Kitchen (embellishments on pages inside the book / adornos en paginas interiores).
  • Book cover-ornament was cut at/ la cubierta del libro se corto a:  5.75 inches.
    • Cut 4 pieces: 2 on chipboard and 2 on cardstock that has been previously covered with self adhesive red glitter paper. (I used recycled chipboard from cereal boxes). / corte 4 piezas: 2 en carton fino, como el que tienen las cajas de cereal y dos en cartulina.
    • Cut ornament tops with mirror carstock. / Corte el "tope" del "adorno" en cartulina brillante.
    • Decorate the book cover as you wish, using pattern and solid papers, flowers, glitter, border punches, etc. / Decore el frente como desee.
    • Cut a strip of paper to write a title. / Corte una tira de cartulina para escribir el titulo.
    • Ink the edges of ALL parts / Sombree todas las orillas de las piezas.

  • Inside pages: / paginas interiores:

    • Cut cardstock at 5.75. Cut as many pages as you need per recipe. ( I cut 11).
    • Cut an ornament top for the back and front of each page. This will give added support when handling pages back and forth.
    • Cut white cardstock circles to write your recipes. Ink well and glue to cardstock pages.
    • Embellish blank spaces on pages with store bought embellishments or make your own.
    • Insert a book ring through the hole in the "ornament" top of each page. Tie a piece of ribbon on the book ring.
WALL HANGING:
  • "Feliz Navidad" ( Merry Christmas) sign:
    • Paint wood board with acrylic paint.
    • Add hardware (on the back) to hang sign from the wall.
    • Cut The letters for Christmas Greeting ( I used Plantin Schoolbook cartridge)
      • Cut them on chipboard and on cardstock. Cover each chipboard letter with the cardstock and ink.
    • Decorate with ribbon bows and flowers. Glue them to the wood with a hot glue gun.
  • Nativity Scene"
    • Paint wood with acrylic paint.
    • Add hardware to hold chain and screw a hook to the bottom of the wood plaque to hold cookbook.
    • Add some shimmer in the center of the board with Smooch Spritz.
    • Cut all Nativity shapes at 3.25 inches.
      • Cut Mary, Joseph and Baby Jesus on chipboard and on cardstock. Cover the chipboard pieces with the cardstock. Stamp faces on Mary and Joseph with Peachy Keen stamps.
    • Ink all shapes and glue to wood board.
    • Cut some pieces of raffia and glue to manger. Add Baby Jesus image.
    • For the STAR: cut one star on acetate and one on white cardstock. Spray Smooch Spritz on the acetate star and allow to dry. Cut of the tail of the cardstock star. Glue the white star onto the acetate star and cover it with Stickles.
Finish wall hanging by adding chain to the hardware in order to link together the Greeting sign and the Nativity. Hang the book from hook.


I now will like for you to hop over to our next blog: http://scrappymel.blogspot.com/

 MeRRy ChrIsTMas !!! .... HaPPy HolIdaYs !!!! :) HaPPy CraFtiNG !!!


ScrappyMel