Thursday, June 10, 2010

"Pretty in Pink"-Bridal Shower Wild Card card/Tarjeta desp. Soltera "Linda en Rosa"-Wild Card


This week, I was watching the Martha Stewart show, and she was making the most amazing flower arrangements in all shades of pink imaginable. The reason: pink will be the trendy color for weddings this summer. I immediately felt inspired. So, I went ahead and grabbed the cartridge that intimidates me just a tad LOL: Wild Card. Again, it took me a while to study and figure out how to put this card together, but I finally did. I will guide you through the steps so that you to can me this beautiful pink Bridal Shower card, found on page 79 of the Wild Card handbook.
***Esta semana, mientras veia el programa de Martha Stewart, ella estaba confeccionando unos arreglos florales increiblemente bellos, todos en tonos rosados. La razon es sencilla: el rosado sera el color de moda para las bodas de verano. Inmediatamente me senti inspirada! Asi que tome el cartucho de Cricut que me causa un poco de intimidacion: Wild Card. Como de costumbre, me tomo un poco de tiempo poder descifrar como armar la tarjeta, pero finalmente, lo logre! Ahora, los guiare a trves de los pasos, para que ustedes tambien puedan hacer esta preciosa tajeta rosada de Despedida de Soltera, que se encuentra en la pagina 79 del manual de Wild Card.

Card:
Tarjeta:
  1. Card and accesories were all cut al 7 3/4 inches. ( La tarjeta y todas sus partes se cortaron a 7 3/4 pulg.)
  2. Bazzill Foil Cardstock was used put under the tower of gifts cut-out of the card and the "wedding rings". (Se utilizo papel plateado marca Bazzill Foil Cardstock para pegarlo debajo de la torre de regalos de la tarjeta y para hacer los anillos). 
  3. Ink and glue the gift tower "skeleton" to the front of the card, over the gift tower cut-out.(Sombree los bordes y pegue el "esqueleto" de la torre de regalos sobre la torre de regalos del frente de la tarjeta.
  4. Embellish the gift tower as you wish, with bows, Stickles and pearls. (Decore la torre de regalos como desee, usando lazos, escarcha "Stickles"y perlas).
  5. Place a piece of white paper inside the card to which you will add the sentiment and the rings. (Coloque dentro de la tarjeta un pedazo de papel blanco, en el que va a estampar un mensaje y pegara los anillos).
  6. Ink edges. (Sombree las orillas de la tarjeta).
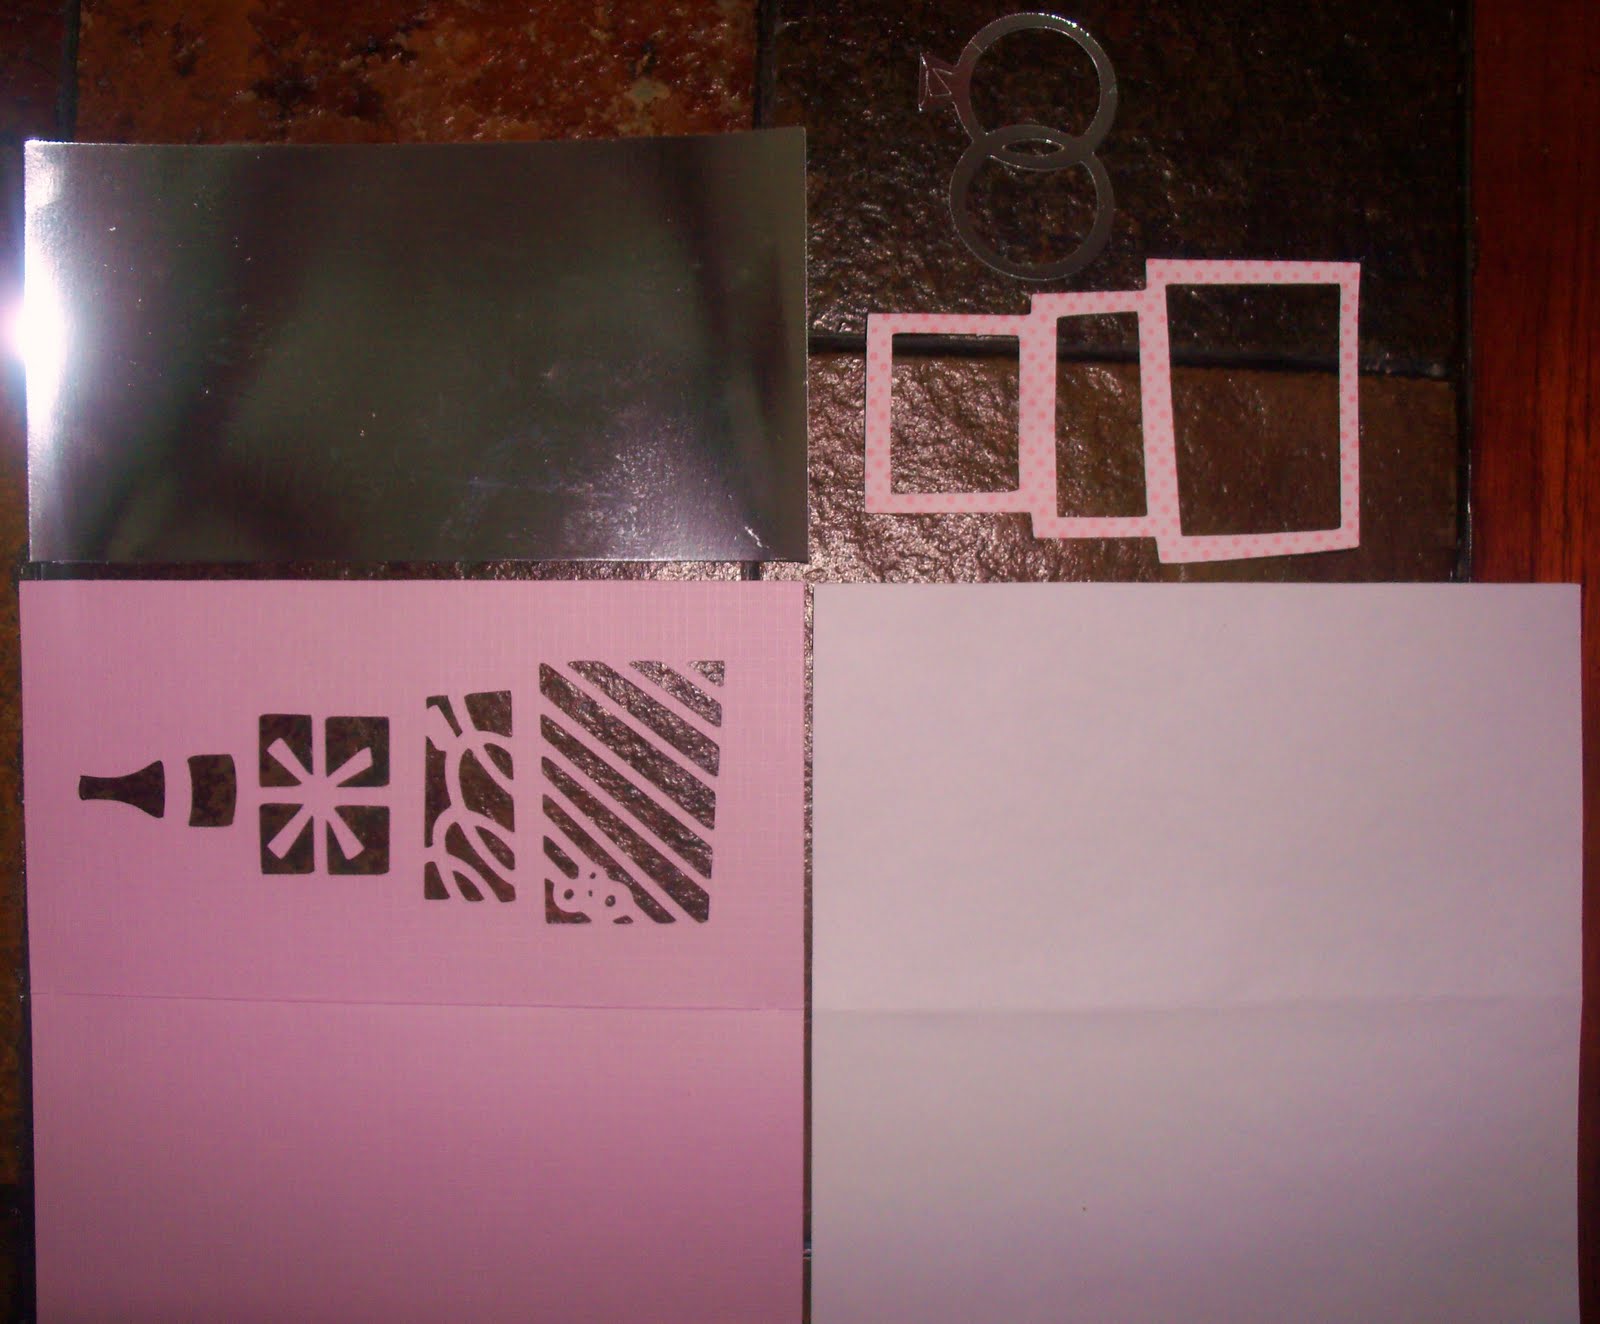
Envelope:
Sobre:
  1. The envelope was cut at 8 inches on a 12x 12 piece of cardstock. (el sobre se corto a 8 pulg. de una cartulina 12 x 12).
  2. Cut by hand a piece of Bazzill Foil Cardstock to fit under the "looped" part of the envelope. ( Corte a mano un pedazo de papel plateado Bazzill Foil Cardstock para acomodarlo debajo de la pesta~na con dise~nos de el sobre).
  3. Adhere liner over the back of the envelope and on top of the back of the foil, as shown. (Adhiera el "forro o cubre faltas" en la parte de atras del sobre, cubriendo la parte posterior del papel plateado, como muestra la foto).
 4. Fold the envelope and glue the parts that requiere it. (Doble el sobre y ponga pega en las partes que lo requieran).
 5. Add the umbrella and the banner with the phrase to the front of the envelope. (Pegue la sombrilla y el "banner" con la frase a el frente de el sobre).

BONUS: Hey, Look at what I did with the cut I did not use: ANOTHER PINK CARD!!!!
                Hey, miren lo que hice, con el corte que no use: OTRA TARJETA ROSA !!!!


Tuesday, June 8, 2010

Baby Angel-Christening Card / Tarjeta de Bautismo-Angelito

This card was made for a baby's Christening. The size of the card is the size that is obtained when folding a piece of cardstock that is 8 1/2 x 11 inches. The "wings" are made from vellum and sprayed with blue glitter hair spray.
*** Esta tarjeta la hice para el bautizo de un bebe. El tama~no final de la tarjeta es el obtenido al doblar un pedazo de cartulina de 8 1/2 x 11. Las alas estan hechas con papel pergamino y rociadas con laca ("spray") de pelo de brillo azul.

The materials used were:
Los materiales usados fueron:
  1. Cricut Cartridges (cartuchos): New Arrivals - baby (bebe); Paper Dolls Dress Up - wings (alas)
  2. Punches (ponchadores): Martha Stewart Punch Around The Page 
  3. Stamp sets (sellos de goma): Stampin Up Bendiciones Especiales - Cross and sentiment (cruz y mensaje). Peachy Keen Stamp Sets
  4. Embossing Powder (polvo para crear relieve): Stampin Emboss Gold (dorado)
  5. Cuttlebug Embossing Folder: Divine Swirls

Saturday, June 5, 2010

Turtle-Save Gulf of Mexico Wildlife card/ tarjeta Tortuga-Salvar Vida Silvestre Del Golfo

Happy Saturday !!! My friend Emma from My Creative Time is having a Challenge. The rules are simple: make an original card with an animal as the theme. I picked up the Animal Kingdom handbook and found a beautiful turtle, that reminded me of the turtles and all the creatures that are in peril in the Gulf of Mexico, because of the oil that is contaminating its waters.
***Feliz sabadooo!!! Mi amiga Emma de My Creative Time hizo un reto. Las reglas son sencillas: hacer una tarjeta original cuyo tema sea un animal. Mientras revisaba el manual de  Animal Kingdom, encontre una bella tortuga, que trajo a mi mente la lucha que en este momento tinen por sobrevivir todos los animalitos que estan en el Golfo de Mejico, por causa del derrame de petroleo.

Cricut Cartridges used:
Cartuchosde Cricut usados:

Friday, June 4, 2010

Flower card and envelope from WILD CARD cart/Tarjeta de Flor con sobre WILD CARD


Hi again !!! Cricut Wild Card cartridge may seem kind of confusing (at least to me LOL). The cartridge is loaded with beautiful cards with a little bit out of the ordinary designs and their (equally spectacular) envelopes.For that reason, I will display in sequence the steps I used to make this card (page 56 of the cartridge). This card is square ( unless you alter its shape on the Design Studio or Gypsy) and it is more suitable for a note card. It can be used for any occasion, and I am using it to give to a young girl that turns 15 tomorrow.
***Saludooooooos nuevamenteeeee !!! El cartucho de Cricut Wild Card es un poco retante y tiende a confundir un poco (al menos, a mi SI). El cartucho esta cargado de tarjetas hermosas y de dise~nos curiosos e incluyen sus sobres (igualmente espectaculares). Por esta razon, mostrare en secuencia, paso por paso, la elaboracion de esta tarjeta (pagina 56 del cartucho). Esta tarjeta tiene una forma cuadrada ( a menos que alteren su forma en el programa Design Studio o en la maquina Gypsy) y es mas bien para enviar alguna notita. Puede ser usada para cualquier ocasion y yo la usare para una Quincea~nera.
  • Card was cut at 4 1/2 inches in height
  • La tarjeta la corte a una altura de 4 1/2 pulgs.
  • The card was cut in blue (la tarjeta la corte en azul)
  • Inside card in yellow (la tarjeta que forma el interior de la misma, la corte en amarillo)
  • Layer of green with leaf marks ( pedadazo de verde, con impresiones cortadas de hojas)
  • Front flower top layer (capa superior de la flor del frente)
Card assembly:
  • ink borders (sombre la orilla de la tarjeta interior amarilla) 
  • place Tacky Tape on top of yellow  inside card, and place the green layer over it.(Ponga la tarjetita verde sobre la pa parte cuadrada amarilla. Peguela con Tacky Tape).


  • Place what you have made on top of the blue (card). Secure with monoadhesive or glue.(Coloque lo que ha hecho ya sobre la tarjeta exterior azul y peguela sobre ella.

  • Fold flower over towards card. (Doble la flor hacia adentro, quedando sobre la parte verde.

  • Add the flower top layer (yellow glitter) to the card flower with Stampin Dimensionals or other pop-up glue dots. (Pegue la flor amarilla con escarcha encima de la flor azul, con almohadillas de dimension Stampin Dimensionals o alguna otra marca).

  • Add a big silk flower (A~nada una flor grande de seda)

  • Add a smaller flower to center (lavender) (Ponga otra flor mas peque~na de color lila, sobre el centro de la flor de seda).

  • Add a brad (purple) A~nada un brad violeta.


Envelope:
*** Sobre:
  • Cut at 4.5 (same as card) (Corte a una altura de 4.5 pulg, al igual que la tarjeta).
  • Glue the green grass to envelope's grass ( Pegue la grama verde sobre la grama azul de la tarjeta).
  • Glue the top layer flower (yellow) to envelope flower and add a brad (purple)/ (Pegue la flor amarilla de la parte superior a la flor de la parte posterior del sobre y coloque en el centro, un brad violeta).
  • Add sentiment and glue decorations to front of envelope. (Estampe el mensaje y termine de adornar el frente del sobre).

Thursday, June 3, 2010

Happy Face and Roses Candy lollipops / Caritas Felices y Rosas de dulce


HI !!! Ever thought of making sweet treats for a party that are simple, delicious, pretty and that require no cooking ????? Well, here they are: candy or chocolate melts. These ones I did with lollipop sticks so that I could arrange them in a basket. I placed a piece of Styrofoam into the basket, stuck the lollipops in it and then covered the Styrofoam with paper grass. You can serve the candy melts in different ways, like on a tray or a pretty serving dish if you not wish to use lollipops.
*** Holaaaa !!! Han pensado alguna vez en prepara algunos antojitos dulces para una fiesta que sean sencillos, lindos,deliciosos y que no haya que cocinar ??? Pues, aqui tengo la solucion: Pastillas para derretir de vainilla o de chocolate. A estos que aparecen en la foto les coloque un palito para poder hacer un arreglo en la canasta.Coloque un pedazo de "styrofoam" en una canasta,enterre los palitos con dulce y cubri el "styrofoam" con grama de papel. Puede presentar los dulces de maners variadas, como: en una bandeja o platos bonitos, si no llevan el palito.

Here are pictures of the steps to make the candy melts and the materials needed:
***Estas son unas fotos de los pasos a seguir para hacer los dulces de pastillas derretidas y los materiales:
  • lollipop sticks (palitos de paleta)
  • treat bags (bolsitas plasticas para alimentos, para cubrir el dulce)
  • candy writer in black (tubo de chocolate oscuro, para hacer detalles de carita
  • plastic bottle for melting candy melts and pouring in molds (bottellas plasticas para derretir las pastillas y vertir en los moldes.
  • molds of the shape you like (moldes de la forma que lo deseen)
  • candy wafers for melting. Can be any color or chcolate. (Pastillas de dulce para derretir, que pueden ser de cualquier color o de chocolate).
The products that I used for these projects are Make n Mold. You can find the same products under the WILTON brand name.
*** Los productos que use para este proyecto son marca Make n Mold. Puede conseguir los mismos productos bajo la reconocida marca WILTON.


  • Put candy writer in hot water before using. Then, trace the features of the smiling faces in the mold. Put in the refrigerator for 10 or 15 minutes.
*** Ponga el chocolate para escribir en agua caliente. Luego, traze el contorno de las facciones de las caritas. Coloque el molde en la nevera por 15 minutos.

  • Add candy wafers in plastic bottle.

  • Melt in the microwave as the instructions on package say.

  •  Remove mold from the refrigerator and fill with the melted wafers.

  •  Add a stick with at least one inch into the melted wafers. Roll the stick to make sure it is completely covered.

  • Put in the refrigerator for 15 minutes and unmold gently.

  • *** Coloque las pastillas de dulce en el recipiente plastico y derrita en el microondas, segun las instrucciones del empaque.

  • Saque el molde de la nevera y vierta la mezcla derretida en los huequitos del molde que forman las caritas. 

  • Ponga los palitos de manera tal, que quede una pulgada dentro de las pastillas derretidas y dele vuelta al palito para que se cubra del dulce derretido

  • Ponga en la nevera por15 minutos mas. Desmolde cuidadosamente.


If you want to make the roses or any other shapes ( there are hundreds of molds) just use the plastic mold you want !!! The procedure is the same. :) TIP: If you plan to make many, buy more than 2 plastic molds.
*** Si desea hacer las rosas o cualquier otra figura (hay cientos de moldes en el mercado), solo use el molde que desea. El procedimiento es el mismo. :) OREJITA: Si piensa hacer muchos, compre mas de 2 moldes plasticos.

Tuesday, June 1, 2010

Fathers Day Card (penguin) / Tarjeta Dia de Los Padres (pinguino)


HI !!! Happy 1st day of June !!! Time to start thinking of Christmas Cards !!! LOL Well, everybody knows how protective father penguins are of their babies, just like my son in law is of my grandson, Santiago.  I designed this cute, cute Fathers Day Card for my grandson to give to his dad on Fathers Day. The Cricut cartridges used were:
*** Holaaaa !!! Feliz primer dia de junio!!! Me parece un buen mes para comenzar a pensar en las tarjetas de Navidad !!! :D Bueno, todo el mundo sabe como los papas pinguinos protegen a sus pinguinitos, tal como mi yerno protege a mi nietecito Santiago. Dise~ne esta tarjeta, para que mi nietecito se la entregue a su papa el Dia de Los Padres. Estos son los cartuchos de Cricut que use:
Other materials used:
  • Stampin Up Stampin Pastels: for the cheeks (Para las mejillas)
  • brad: beach ball (bola de playa)
  • Stampin Up Classic Stampin Pad in basic Gray: Inking borders ( sombrear orillas)
  • fine point marker (marcador de punta fina): used to write "with Dad" (se uso para escribir "with Dad", que signigica "con papa").

Sunday, May 30, 2010

Fathers Day Card (sailboat) / Tarjeta Dia Del Padre (velero)


Last year, I made this fathers Day Card. I think that it was the second card I made after having my Cricut Expression. I used the Going Places cartridge, which I strongly recommend if you need to make cards for men. I used the sailboat, compass and wave images from page 113 of the handbook. As this card was made for a music and sea lover, a Cuttlebug musical notes embossing folder was used on the "sky". The "happy fathers day" message was written in the computer and pasted on a piece of cardstock on the card.
*** El a~no pasado, hice esta tarjeta para el Dia de Los Padres y fue la segunda tarjeta que hice con mi Cricut Expression. Para esta tarjeta use el cartucho Going Places, el cual grandemente les recomiendo cuando necesiten hacer tarjetas con temas masculinos (hombre). El velero, compas y olas son de la pagina 113 del cartucho. Como esta tarjeta fue hecha para un amante de la musica y del mar, le di impresion de notas musicales al "cielo" con un sobre de Cuttlebug. El mensaje de "Feliz Dia de Los Padres" lo hice en la computadora y lo pegue en un pedacito de cartulina sobre la tarjeta.