Saturday, March 5, 2011

Easter Gift Bag... Oh so Cute !!!


Hi there !!!! First of all, I want to thank Tammy and Angela for giving me the oportunity to show them around when their cruise stopped at San Juan, Puerto Rico's port. We had so much fun. Wish we have had more time :(
From today on, for three months, I will have the pleasure and the honor of posting a Cricut Imagine project on this blog every Saturday. Today, I will start with an Easter project... yes, because I know that everyone is so ready for spring. I made the cutest Easter gift bag. :)

Recipe:

Imagine cartridges: Blossom (yellow background); Nursery Tails (lamb, bird on branch)
Cricut cartridge: Easter (fonts)
Embossing folder: Cuttlebug Divine Swirls
White cardstock: American Crafts
Stickles
Liquid Applique by Marvy Uchida to create the "wool" on lamb.
  • Flood fill to create pattern paper for background:


  • Cut out shapes and decorate; emboss background, and put together:


  • Cut background to fix the front of the bag - Decorate corners with a punch - Affix to bag - Glue "Happy     Easter" to background.


Saturday, February 12, 2011

My Vintage Valentine Blog Hop


Hellooooooo everyone !!! HaPPY VaLenTInE'S DaY to you all !!! You should be arriving here from Theresa's blog at http://www.thescrapbookingqueen.com/. If you just started right here at my blog, I am so sure you don't want to miss all of the other "Vintage Valentine) projects so, click right here if you want to check them out from the beginning. Thank you Jess for giving me the opportunity (again) to be a part of this great blog hop.

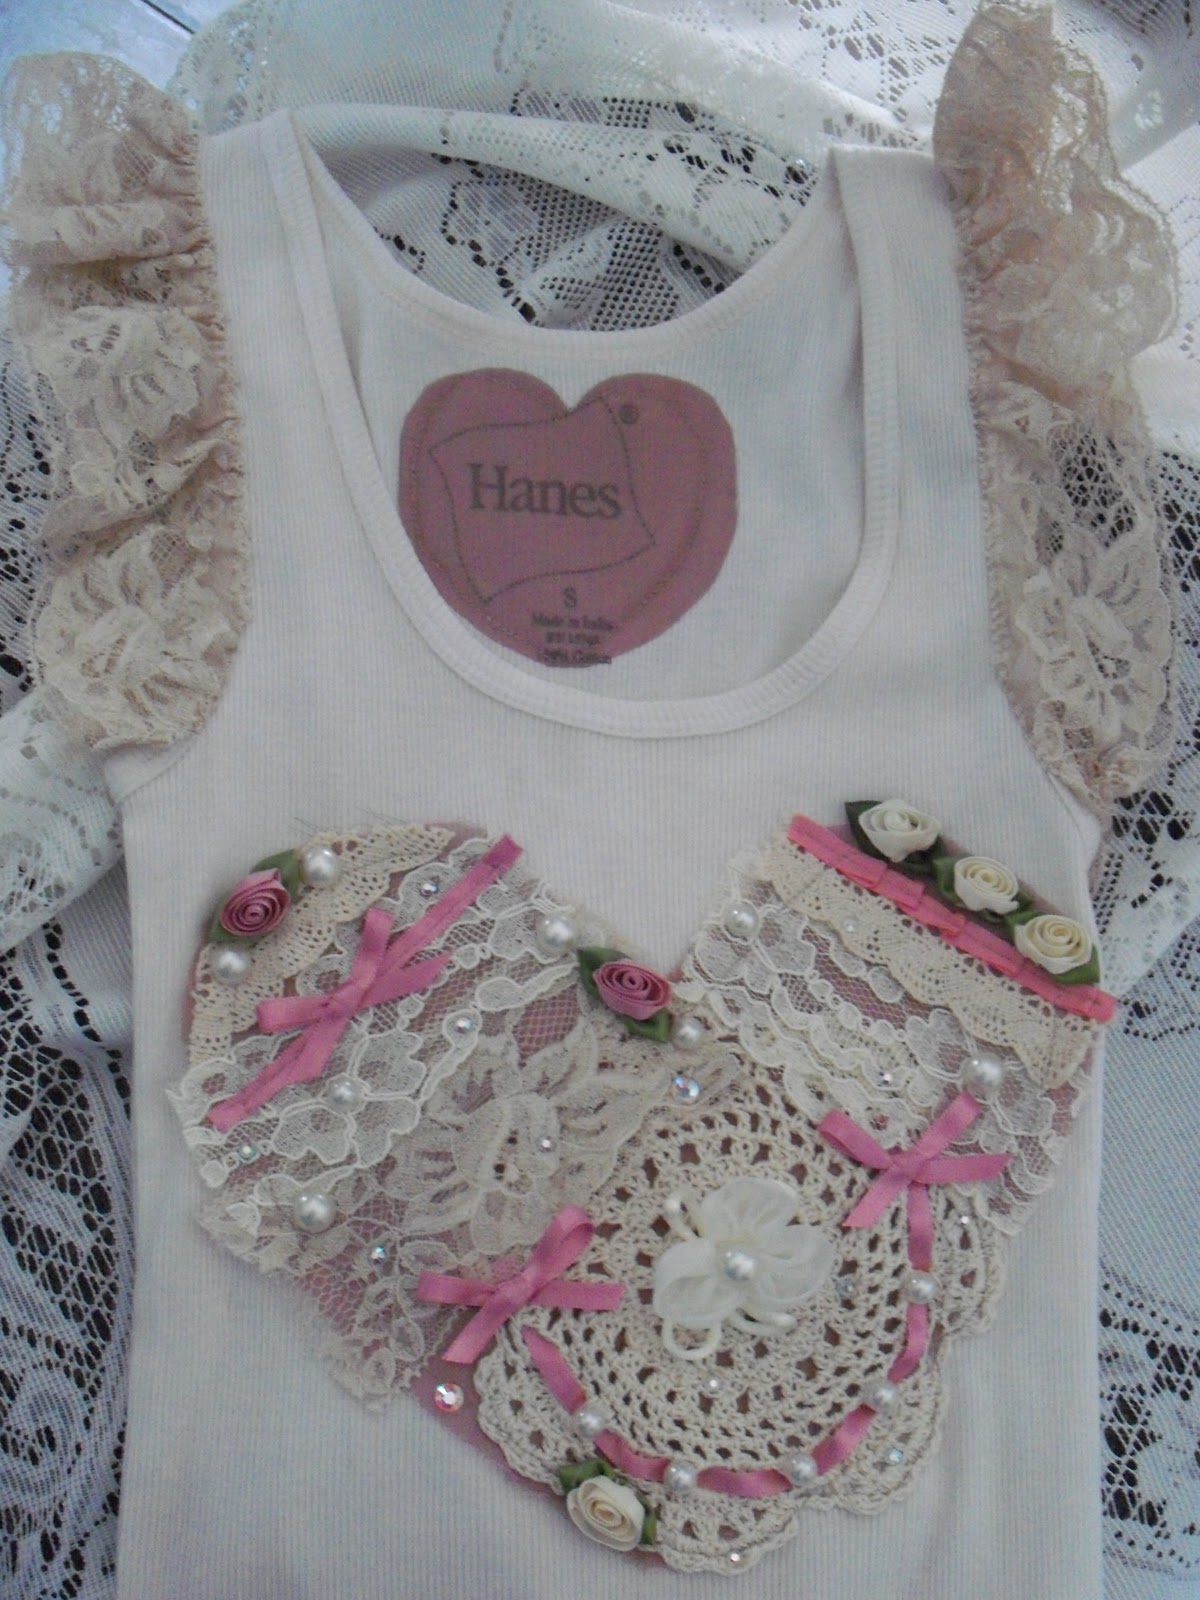
I love Vintage !!! I wanted to make something that will last and that wouldn't get put away in a drawer or lost on a shelf. So, I decided to make an altered Tank Top. It was sooooooo much fun.

  • Wash and dry the Tank Top
  • "AGE" your Tank Top, by coloring it with COFFEE !!!
    • In a big pot, mix water, a cup or two left over coffee (preferably strong), a tablespoon of salt.
      • Add the Tank Top to the mixture
      • Heat to a boil
      • lightly hand wash, rinse and dry
  • Gather and sew a strip of lace to the armholes on the Tank Top
  • Cut out a template of a heart.
    • Cut out a heart using the template and sew to the Tank Top. 
  • Sew a crocheted doily to the heart
  • Gather all the pieces of lace and ribbon from your stash, and start sewing them onto the heart.
  • I embellished the heart with flat back Swarovski crystals, flowers and pearls


  • Completed front view:


  • Back view:


Thank you so much for stopping by. Now, hop on to Jill at http://thescrapoholic.blogspot.com/ to see what she has made for us. :)
Here is a list of all participating blogs, in case you need it.


KinderStampO - www.KinderStampO.com
Martha C. - http://dreamofcrafting.blogspot.com/ THATS ME !!!!!

Friday, February 11, 2011

Valentine's Day projects in Gray, Pink and Red.


Just wanted to show you three projects I made for Valentine's Day, using non-traditional colors for this day: gray, pink, red. I downloaded the paper design from gift-wrapit.com.
So here they are:


Martha Stewart punch; Pink By Design stamp.


Spring Holidays Cricut cartridge; Cuttlebug folder (Swiss Dots)


Pillow Box; MS punch; Cuttlebug Swiss Dots), Pink By Design stamp.

Valentine's Day Cookie Treat Bags


Today is my grandson's Santiago first Valentine's Day party. It is at his Day Care. I had never had such a huge/emotional/exciting welcome like when today Santiago saw me at the door of his colorful "classroom". He shouted: "ABUELAAAAAAA" (grandma) while pointing to the door.
I made the cookies and did the decorations for the treat bags.
I used the following:
Every Day Paper Dolls for the dog.
Plantin Schoobook for the heart.
Martha Stewart punch for the border.


Tuesday, February 8, 2011

Cards for my Soldier Boy: BCT Graduation Day


Hello there !!! In just 9 days, I will be looking with pride at my son Brandon graduating from ARMY Basic Combat Training. He will then go to AIT, to further studies on communications and computer skills. CONGRATS, my dear son, and may God bless you and protect you always.

For this card, I used the following materials:

  • Unity Stamp "Shoot For The Moon"
  • Ranger Adirondack Pitch Black ink pad
  • Sakura Metallic Gelly Roll Pens
  • Spellbinders Nestabilities "Standard Circles"
  • Cuttlebug embossing folder: "Divine Swirls"

Thursday, February 3, 2011

Altered Binder for Baby Santiago's Day Care - Imagine Blast Off cartridge


Hi again!!! A few days ago, my daughter asked me if I could decorate a binder for my grandson Santiago's new Day Care. I was in a hurry, so I picked up some white cardstock and went to work with my Cricut Imagine. I used Blast Off Imagine cartridge for most all of the project, except for the balloons, cat and dog, that were cut from Imagine More Imagine cartridge. I had lots of fun making this project. :)

This is a view of the back of the binder:


Friday, January 28, 2011

Valentine's Day Card for my soldier (son).- Unity Stamps


Hi!!! Valentine's Day is almost her and so is my son's ARMY Basic Combat Training graduation. I will be flying to South Carolina in mid February to spend some fun time with him, even if it is for  just 2 days. :) Making cards for a military boy is kind of a challenge for me, because I have to refrain myself from adding embellishments and dimension . Oh well ....

Recipe:
Unity Stamp Company: Sending My Love stamp set
Martha Stewart markers
Adirondack ink pad: pitch black
Martha Stewart Punch Around the Page: Heart Chain


  • Stamp image and color in.
    • NOTE: When I was "blending" the blue shadow effect around the image with the Martha Stewart blender, the marker was almost dry. It damaged the paper a little bit but, it gave the card a needed texture LOL.

  • Cut out the "envelope" and place on the opening of the mailbox.
  • Cut and mat the image.