HI !!! I am taking a very short crafting break, because my firstborn, who is a sailor in the USNAVY, is home for a few days. See you soon!! Happy Crafting!!! :)
Hola !!! Estoy interrumpiendo por muy poquitos dias mis manualidades, ya que mi hijo mayor, que pertenece al USNAVY, se encuentra en casa de vacaciones. Nos vemos prontitoooo!!! :)
Tuesday, June 22, 2010


Saturday, June 19, 2010
First Communion card-Paper Doll Dress Up / tarjeta de Primera Comunion

**** Feliz sabado a todoooosss !!! Mi hijo mayor, que es militar en el USNAVY, se encuentra en casa desde ayer pasandose unas cortas vacaciones. Por lo tanto, no estare actualizando mi blog muy frecuentemente, mientras el se encuentre aqui, pero se que ustedes me entinden :). Esta tarjeta de Primera Comunion, la hice hace unos meses (de hecho, que hice muchas) para ser vendida en una boutique de ropa de ni~nos en mi area.
Here is how I made it:
Asi fue que la hice:
- cartridge ( Cartucho): Paper Doll Dress Up
- border punch (Poncahador para borde): Martha Stewart
- face stamp (Sello para la carita): Peachy Keen Stamps PK-560 Dolly Dumplins
- glitter (Escarcha): Martha Stewart Woodland Glitter Set
- vellum paper (papel pergamino)
- Embossing folders (Sobres para crear relive): Cuttlebug
- sentiment stamps (Sellos para estampar mensaje): Stampin Up
- Shadowing borders (Sombreado de los bordes): Stampin Pastels
- Stardust Stickles for flower crown. (Stardust Stickles para la corona de flores)


Cut the dress twice: once with cardstock and the other with vellum. Decorate the vellum dress using a white pen like Gelly Roll (Sakura), pierce with a paper piercer and, add a pearl. Glue the vellum layer of the dress to the cadstock dress. Add Stickles to shoes and crown.
****Corte el cuerpito y estampe la carita. Coloree los detalles de la carita y de los ojos.
Corte el trajecito dos veces: uno en cartulina y el otro en pergamino. Decore el trajecito de pergamino con un boligrafo blanco, como Gelly Roll (Sakura). Haga agujeritos con un calador y para finalizar, coloque una perlita. Pegue el trajecito de pergamino sobre el de cartulina con pega para papel pergamino. A~nada Stickles a los zapatos y a la coronita.
Inside the card:
La tarjeta por dentro:

Monday, June 14, 2010
Sweet Baby Girl card-New Arrivals cart/tarjeta Mi Dulce Bebe (nena)

Esta linda tarjeta de bebe para una ni~nita, la hice con el cartucho New Arrivals. Use la funcion de "blackout" de la figura del bebe, para poder estampar su carita con los sellos Peachy Keen Stamps.
- border punch (Ponchador de bordes): Martha Stewart
- embossing folder for clouds (Sobre para texturizar nubes): Cuttlebug Divine Swirls.
- dimensional dots (almohadillas para dar dimension): Stampin Dimensionals
- add half pearls to ears and swarovski crystal to bow (A~nada perlas a las orejas y un cristalito swarovski al lazo.
- Add Stardust Stickles to clouds (A~nada Stardust Stickles a las nubes).
Friday, June 11, 2010
Purse card-Paisley cartridge/tarjeta Cartera-cartucho Paisley

Happy Friday !!!! This is my entry for Emma's Throwback Thursday Challenge at My Creative Time. The requierements are: be original and use the colors blue, red and brown. For this card I used the Paisley cartridge. I designed it in my Gypsy in order to weld the purse's 2 "shadows" to make a folding card shaped like a purse.
Feliz vierneeeeesss !!! Esta es la tarjeta que hice para el reto "Throwback Thursday" de mi amiga Emma en My Creative Time. Los requisitos son: ser original y usar los colores rojo, azul y marron (casta~no). Para esta tarjeta, use el cartucho de Cricut, Paisley. Dise~ne esta tarjeta en mi Gypsy, para poder "soldar" las 2 partes de la tarjeta, con el proposito de formar una tarjeta en forma de carterita que abra y cierre.
- Cuts used to make the purse (page 54):
- Cortes usados para hacer la tarjeta (pagina 54):

Putting it together:
Vamos a armarla:
- Fold blue card in half. (Doble la tarjeta por el medio).
- If you wish, give texture to your purse parts and ink. (Si lo desea, de textura a las partes de su cartera y sombree las orillas).
- Glue the lower part of the purse; then the upper part. (Pegue primero, la parte inferior de la cartera a la tarjeta y luego la superior).
- Glue the "metal handle"to purse. (Pegue el "mango de metal" a la cartera).
- Add broche and "bling". (A~nada el broche y la piedra).

Thursday, June 10, 2010
"Pretty in Pink"-Bridal Shower Wild Card card/Tarjeta desp. Soltera "Linda en Rosa"-Wild Card

This week, I was watching the Martha Stewart show, and she was making the most amazing flower arrangements in all shades of pink imaginable. The reason: pink will be the trendy color for weddings this summer. I immediately felt inspired. So, I went ahead and grabbed the cartridge that intimidates me just a tad LOL: Wild Card. Again, it took me a while to study and figure out how to put this card together, but I finally did. I will guide you through the steps so that you to can me this beautiful pink Bridal Shower card, found on page 79 of the Wild Card handbook.
***Esta semana, mientras veia el programa de Martha Stewart, ella estaba confeccionando unos arreglos florales increiblemente bellos, todos en tonos rosados. La razon es sencilla: el rosado sera el color de moda para las bodas de verano. Inmediatamente me senti inspirada! Asi que tome el cartucho de Cricut que me causa un poco de intimidacion: Wild Card. Como de costumbre, me tomo un poco de tiempo poder descifrar como armar la tarjeta, pero finalmente, lo logre! Ahora, los guiare a trves de los pasos, para que ustedes tambien puedan hacer esta preciosa tajeta rosada de Despedida de Soltera, que se encuentra en la pagina 79 del manual de Wild Card.
Card:
Tarjeta:
- Card and accesories were all cut al 7 3/4 inches. ( La tarjeta y todas sus partes se cortaron a 7 3/4 pulg.)
- Bazzill Foil Cardstock was used put under the tower of gifts cut-out of the card and the "wedding rings". (Se utilizo papel plateado marca Bazzill Foil Cardstock para pegarlo debajo de la torre de regalos de la tarjeta y para hacer los anillos).
- Ink and glue the gift tower "skeleton" to the front of the card, over the gift tower cut-out.(Sombree los bordes y pegue el "esqueleto" de la torre de regalos sobre la torre de regalos del frente de la tarjeta.
- Embellish the gift tower as you wish, with bows, Stickles and pearls. (Decore la torre de regalos como desee, usando lazos, escarcha "Stickles"y perlas).
- Place a piece of white paper inside the card to which you will add the sentiment and the rings. (Coloque dentro de la tarjeta un pedazo de papel blanco, en el que va a estampar un mensaje y pegara los anillos).
- Ink edges. (Sombree las orillas de la tarjeta).
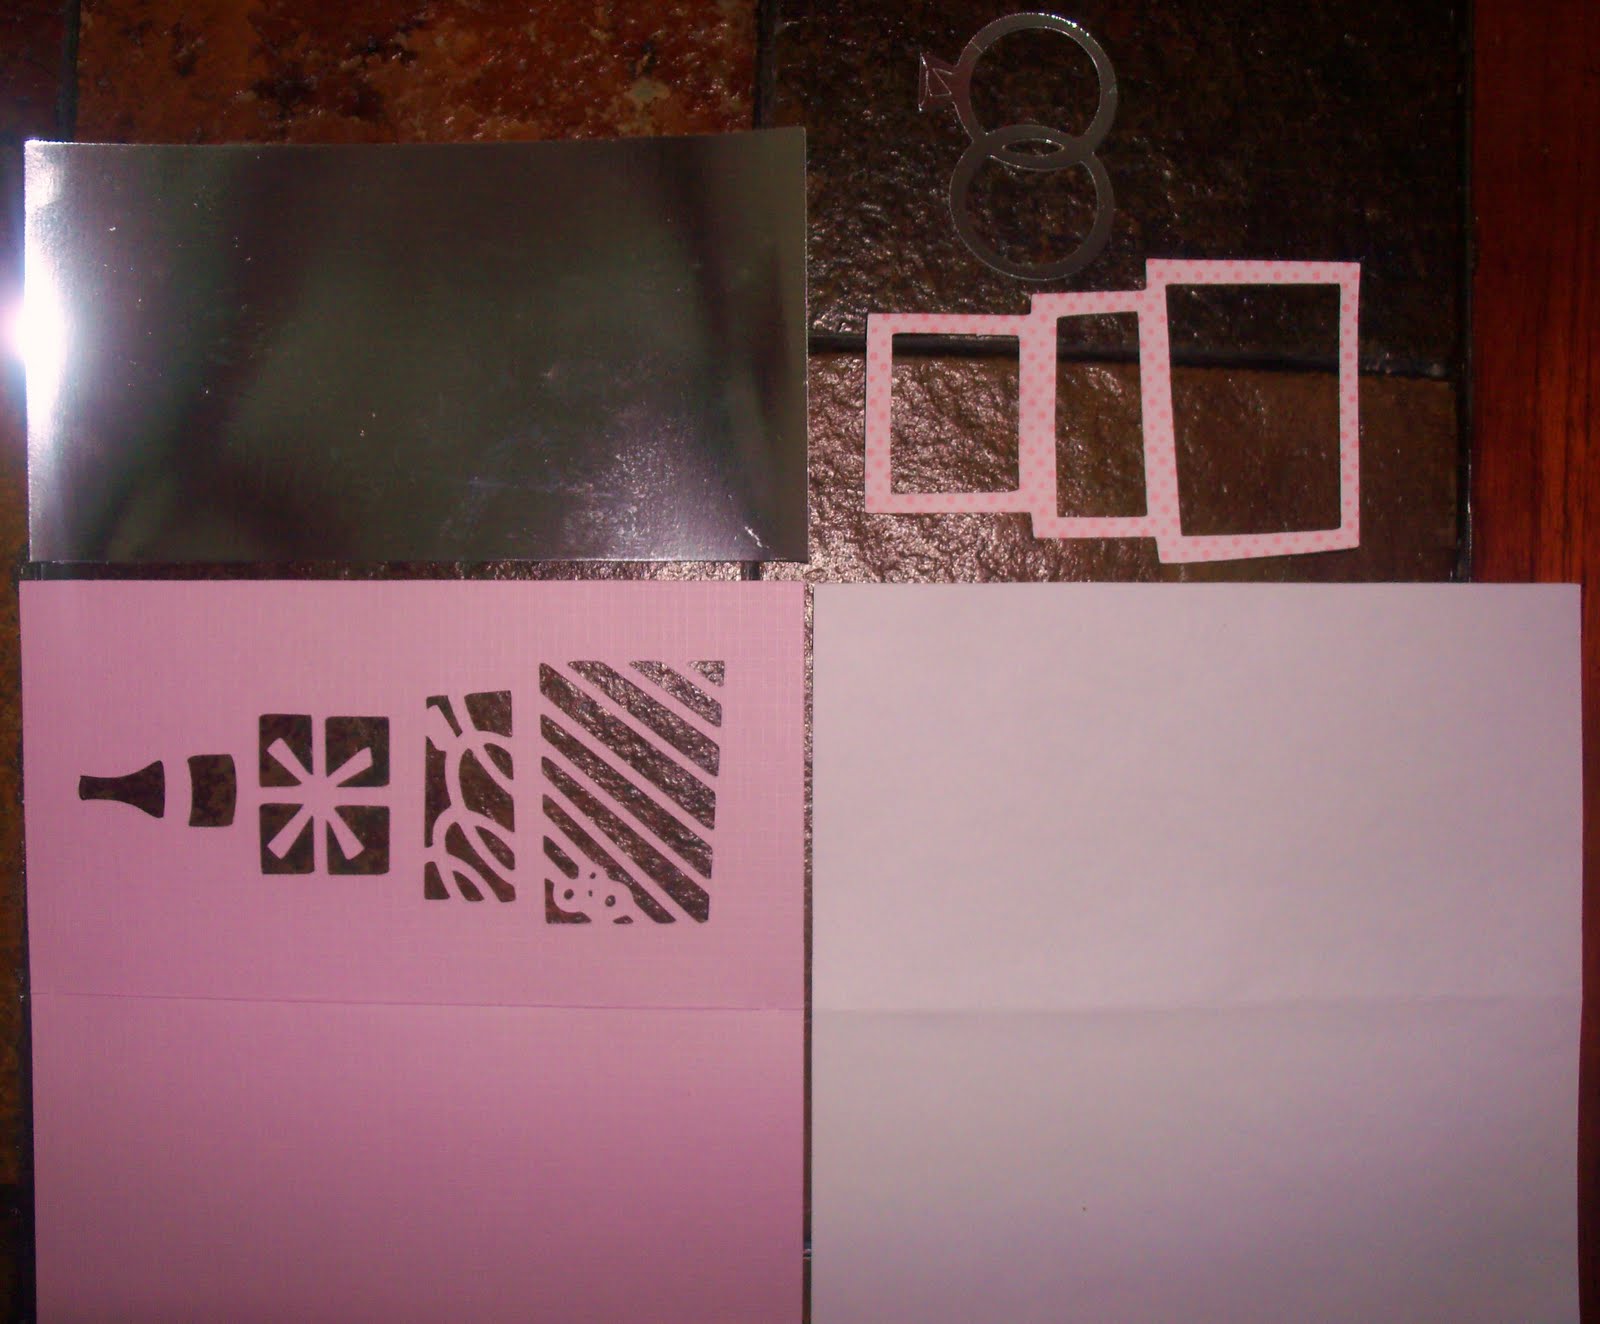

Sobre:
- The envelope was cut at 8 inches on a 12x 12 piece of cardstock. (el sobre se corto a 8 pulg. de una cartulina 12 x 12).
- Cut by hand a piece of Bazzill Foil Cardstock to fit under the "looped" part of the envelope. ( Corte a mano un pedazo de papel plateado Bazzill Foil Cardstock para acomodarlo debajo de la pesta~na con dise~nos de el sobre).
- Adhere liner over the back of the envelope and on top of the back of the foil, as shown. (Adhiera el "forro o cubre faltas" en la parte de atras del sobre, cubriendo la parte posterior del papel plateado, como muestra la foto).


5. Add the umbrella and the banner with the phrase to the front of the envelope. (Pegue la sombrilla y el "banner" con la frase a el frente de el sobre).


BONUS: Hey, Look at what I did with the cut I did not use: ANOTHER PINK CARD!!!!
Hey, miren lo que hice, con el corte que no use: OTRA TARJETA ROSA !!!!

Tuesday, June 8, 2010
Baby Angel-Christening Card / Tarjeta de Bautismo-Angelito

*** Esta tarjeta la hice para el bautizo de un bebe. El tama~no final de la tarjeta es el obtenido al doblar un pedazo de cartulina de 8 1/2 x 11. Las alas estan hechas con papel pergamino y rociadas con laca ("spray") de pelo de brillo azul.
The materials used were:
Los materiales usados fueron:
- Cricut Cartridges (cartuchos): New Arrivals - baby (bebe); Paper Dolls Dress Up - wings (alas)
- Punches (ponchadores): Martha Stewart Punch Around The Page
- Stamp sets (sellos de goma): Stampin Up Bendiciones Especiales - Cross and sentiment (cruz y mensaje). Peachy Keen Stamp Sets
- Embossing Powder (polvo para crear relieve): Stampin Emboss Gold (dorado)
- Cuttlebug Embossing Folder: Divine Swirls
Saturday, June 5, 2010
Turtle-Save Gulf of Mexico Wildlife card/ tarjeta Tortuga-Salvar Vida Silvestre Del Golfo

***Feliz sabadooo!!! Mi amiga Emma de My Creative Time hizo un reto. Las reglas son sencillas: hacer una tarjeta original cuyo tema sea un animal. Mientras revisaba el manual de Animal Kingdom, encontre una bella tortuga, que trajo a mi mente la lucha que en este momento tinen por sobrevivir todos los animalitos que estan en el Golfo de Mejico, por causa del derrame de petroleo.
Cricut Cartridges used:
Cartuchosde Cricut usados:
- Animal Kingdom: turtle looking forward, turtle border (tortuga mirando de frente, borde de tortugas)
- Create a Critter: turtle with dots (tortuga con circulos)
- Spongebob: Wood sign (letrero)
- Give a Hoot: puddle (charco de agua)

Subscribe to:
Posts (Atom)